
RETECHNOLOGY PREMIUM MARKETPLACE RELATED PRODUCTS | WEBINARS | SPECIAL OFFERS


You are viewing our site as an Agent, Switch Your View:
Agent | Broker Reset Filters to Default Back to ListEasy Hacks for Prospecting and Marketing Automation Success
November 27 2023
 Have you ever wished you could connect RPR (Realtors Property Resource®) to your CRM, or maybe directly to Canva for prospecting and farming? Well, we're not quite there yet, however there are a few things you can do to "hack" the system and be on your way to prospecting and automation success.
Before we jump in, if you're just getting started in real estate or want to give your database a boost, be sure to check out this previous article: How to Build your Neighborhood Database From Scratch. Think of it as some prerequisite reading to this article. You'll get an understanding of what datasets are available to you from RPR and all the info you need on RPR's Mailing Labels.
Now you have an understanding of how to set up your CRM and how you can export RPR Mailing Labels. Here's where we take it a step further, beyond pre-formatted labels and right into marketing automation territory: the ability to export raw data via a CSV export.
In this article, we're going to take the next step and strategically filter for specific types of prospects.
Automate your marketing and targets prospects with these "Recipes"
Below are a few "recipes," based on real world scenarios, that you can use with the RPR Advanced Search feature to help you spot target prospects with ease.
To drill down and identify Current Renters/Potential Homeowners, follow these steps:
- Step #1: Click "Research"
- Step #2: Click "Map Search"
- Step #3: Search your target area (hint: you can search as small as a neighborhood)
- Step #4: Click "More Filters" for advanced searching
- Step #5: Change the search to "Public Records" (you'll want to target less than 500)
- Step #6: Scroll down to "Miscellaneous Fields" and make sure "Absentee Owner" is selected
- Step #7: Make sure "Time Owned" is selected to the 5-10 and 10-15 year groupings
- Step #8: Click "Update and Search"
- Step #9: Click "Mailing Labels"
- Step #10: Select "CSV"
- Step #11: Make sure the "Address Type:" is "Property"
- Step #12: Change the "Addressed To:" field to "Current Resident" or to "Custom Name" and fill it out with something like "Future Homeowner"
- Step #13: Select "Absentee Owner" as the "Occupancy Type"
- Step #14: Run full list, or narrow records to export
Target: Potential Home Sellers
Follow steps 1-5 from above, then continue with:
- Step #6: Scroll down to "Miscellaneous Fields" and make sure "Owner Occupied" is selected
- Step #7: Make sure "Time Owned" is selected to the 5-10 and 10-15 year groupings
- Step #8: Click "Update and Search"
- Step #9: Click "Mailing Labels"
- Step #10: Select "CSV"
- Step #11: Make sure the "Address Type:" is "Property"
- Step #12: Change the "Addressed To:" field to "Owner Name"
- Step #13: Select "Owner Occupied" as the "Occupancy Type"
- Step #14: Run full list, or narrow records to export
Need Help? Take a step-by-step guided tour of the two examples above.
From here, you can take these lists and add additional columns to your sheet that would match your CRM (ie: "Status" and then set it to say "Prospect-Buyer" or "Prospect-Seller,") this can work with Google Sheets or your CRM of choice. If you're working with a CRM, instead of additional columns, when you're importing your contacts, simply apply flags or categories directly within your platform to help keep your contacts organized.
But, let's not stop there, let's set up an automation that can do all of that for you…
Making automations and RPR work for you
The beauty of this workflow is the ability to essentially take this data right from RPR and apply it directly to your CRM or Google Sheets contact list. Then using preset triggers with tools such as IFTTT, Zapier and Canva, you can create a multitude of marketing automations that will cut down the manual labor of simple marketing tasks.
In this next example, we're going to show you how to take the exports above and connect them directly to Canva to complete a postcard that you've prepped with the most current Market Trends Data and then print it with all of your prospect's data added to it.
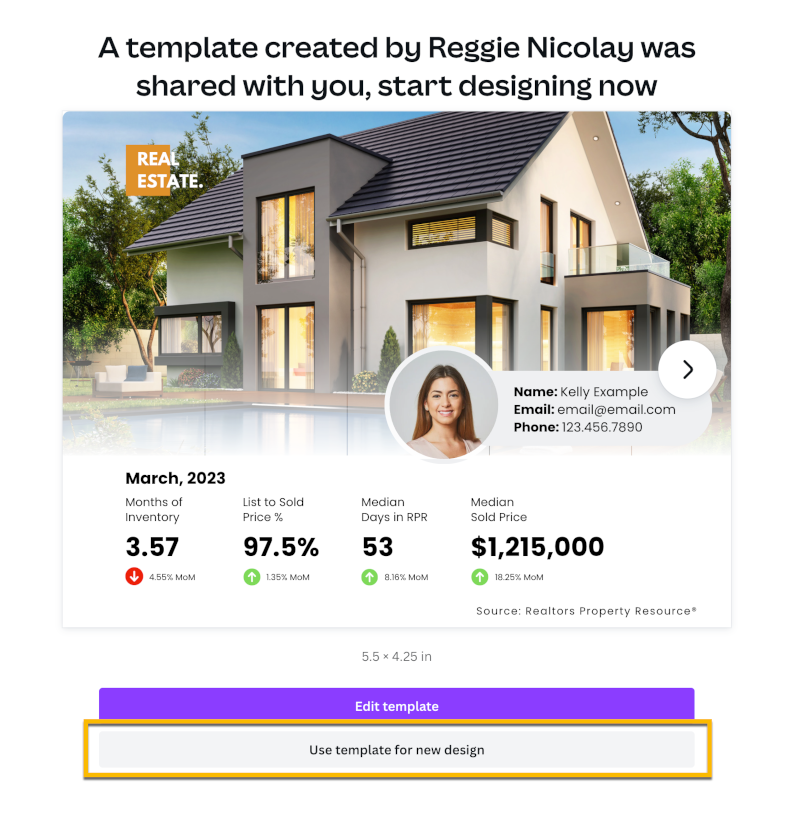
To get started, head over to RPR's Resource Center and choose a Canva postcard template that you'd like to work from.
Be sure to select "Use template for new design" to get started. Next, add your photo and update your information for both sides of the postcard–you don't want to accidentally send your mailing out with filler text. Write a compelling introduction of yourself and why it's a good time to buy; better yet, read on and we'll show you how to let our Market Trends ScriptWriter powered by ChatGPT help you craft the perfect message!
Before we add our contact data, let's update the Market Trends information with the latest stats. When you're in RPR, head up to Research, then click Residential Market Trends and search for the geography that you executed for your export. This ensures that the data matches the postcard template with the month and the correct data points. Now we're ready to add our prospect's info to the Canva doc!
PRO TIP: Looking for the perfect copy to go with your postcard? Click "Create Script" to give our AI-powered Market Trends ScriptWriter a try. You can easily generate Metric Analyses and Social campaigns, and the copy generated can easily flow into to your postcard.
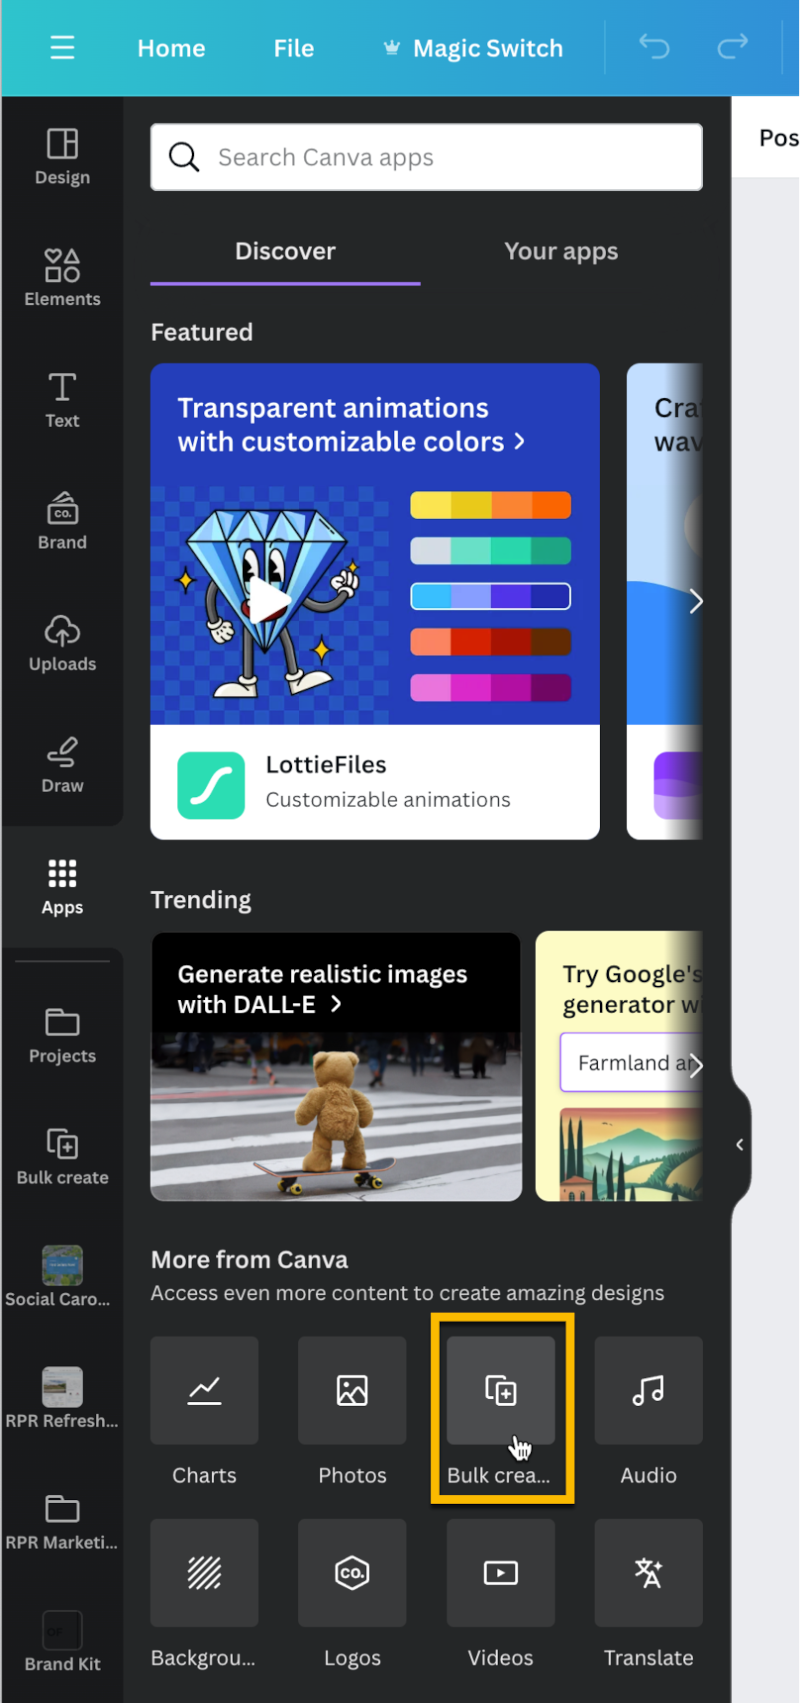
From the left side navigation menu, go to "Apps," and go down to "More from Canva" and select "Bulk create." Maybe in the future, there'll be a "Bulk create from RPR," but for now, select "Bulk create."
You essentially have two options here, you can manually enter your data or upload a CSV file. Let's click "Upload CSV" select your list, and all of your fields will be listed by the column headers.
PRO TIP: Before you upload your list, open it up and delete any extra fields that you think won't be necessary. Since we are prospecting to potential buyers, we won't be needing the owner's information that by default comes with the export.
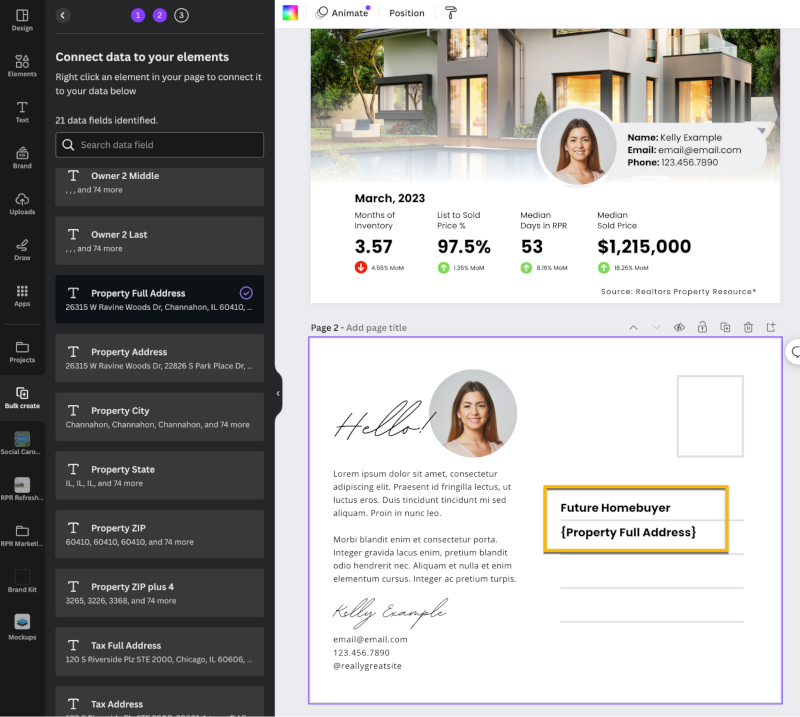
Next, we're going to connect our data to text fields. So, add a few text fields to the backside of the postcard template. For the greeting, make it fun, since you don't know the person who is renting the property, you could address it to "Future Homeowner." For the next text field, right click it and select "Connect Data." Canva will then present you the list of all your data fields, select "Property Full Address," or whichever combination of fields that you need to complete your mailing.
After you have set up your data and added all of your personal information and market data, click "Continue." This will take your data and merge it into a new Canva Doc that you can now send out for print. Pretty cool, huh?!
To view the original article, visit the RPR blog.